The V3 API Developer Portal comprises three distinct components:
- API Docs - home to conceptual, procedural, API how-to’s with examples and best practices
- API Reference - describes each endpoint and method in detail with a Try feature to make real API calls to your CTCT account
- My Applications - self-service portal to sign up for an account, register your application, generate and manage API keys
API Docs
API Docs is the home to user guides for each endpoint grouping (Contacts, Lists, etc.). The user guides provide:
- a conceptual overview of each API resource
- detailed use cases illustrating common sets of tasks with step-by-step instructions and code samples in multiple languages
- API best practice guidelines, along with guidelines on what to avoid
- Detailed explanation of the [V3 API OAuth 2.0][auth_overview] implementation and how to implement [Client][client_flow] and [Server][server_flow] OAuth flows in your integrations
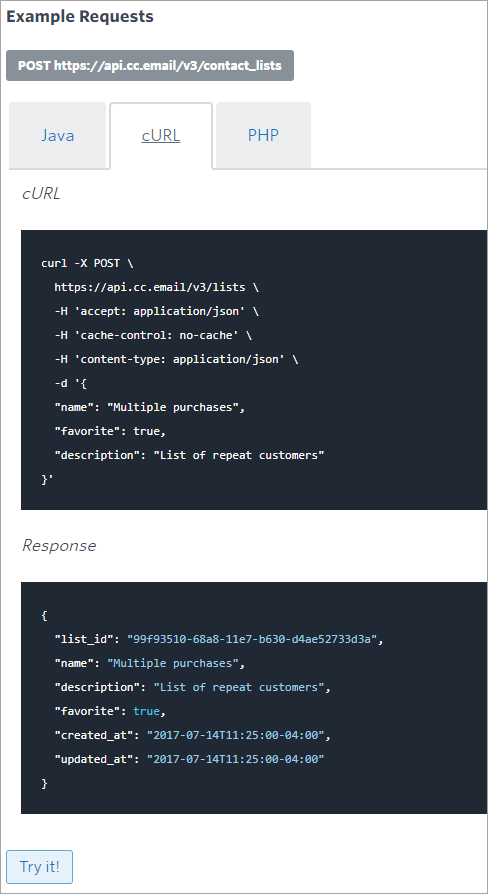
Code Samples
Code samples are used in the API Docs to provide examples of a properly constructed API call in a specific language. Code samples are provided in multiple languages: cURL, JAVA and PHP. The sample do not specify or rely on a specific version or framework, and do not call specific libraries.
Tags for Related Topics
At the bottom of most API Docs pages is a set of Tags that link to curated lists of related topics.

API Reference
The API Reference provides documentation describing each V3 API endpoint with the following details:
- Supported methods
- All query and path parameters
- Response type
- Response codes and messages
- For PUT & POST methods - sample request payloads and JSON schema model
- For all methods - sample response payloads and JSON schema model
 button for making an API call in the API Reference.
Body and Response Schema
The body (PUT, POST) and response JSON schema for each endpoint and method combination are provided in the right-hand column of the API Reference.
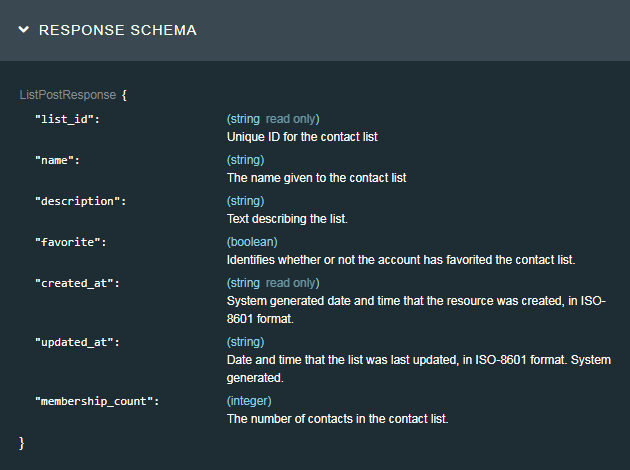
The schema provides detailed definitions for the object and all of its properties to which the endpoint provides access. The schema provides the following for each object & property:
- name
-
type - string, boolean, array, integer
For string type - List of enumerated values (Enum), Max Length (maximium number of characters) as applicable
- description - explains how the object or property is used, including any associated business logic
You can download the entire V3 API schema in YAML format [here][v3api_schema].
Making API Calls
You can make V3 API calls to your Constant Contact account from the API Reference for each endpoint and method available.
To make a call:
- Click
 to authenticate and grant access to the API Reference.
 - Sign in to your Contant Contact account.
- Grant access to the API Tester app. Constant Contact requests all available scopes so you can use the API Tester with all available endpoints. After you’ve granted access,
 appears on the button.
 -
To make a GET call:
- For a GET call, select the parameters to include in your call as desired, from the Parameters section
- Click
to send the request.

An overlay displays the results of the API call.

-
To make a PUT or POST call:
- Click the Body Sample to populate the body field with that JSON example and modify it as needed, or use your own request payload.

- Click
to authenticate if needed.
- Click
to send the request.
My Applications
My Applications is where you register and manage your applications in our V3 API ecosystem.
Getting Started
You need to have a Constant Contact account to use My Applications. Clicking My Applications brings you to the log in or sign up page. If you don’t already have a Constant Contact account, you can sign up for one here. Otherwise, log in with your existing Constant Credentials. Once you are logged in, the My Applications page displays.
Registering an Application
Register your application to get an API key, client_secret, and set a redirect_uri.
- Click
 to register your application. The New Application overlay displays.
 - Enter the name of your application, up to 50 characters. Users will see this name when they grant it access to their Constant Contact account.
- Click Save. The App details page displays.
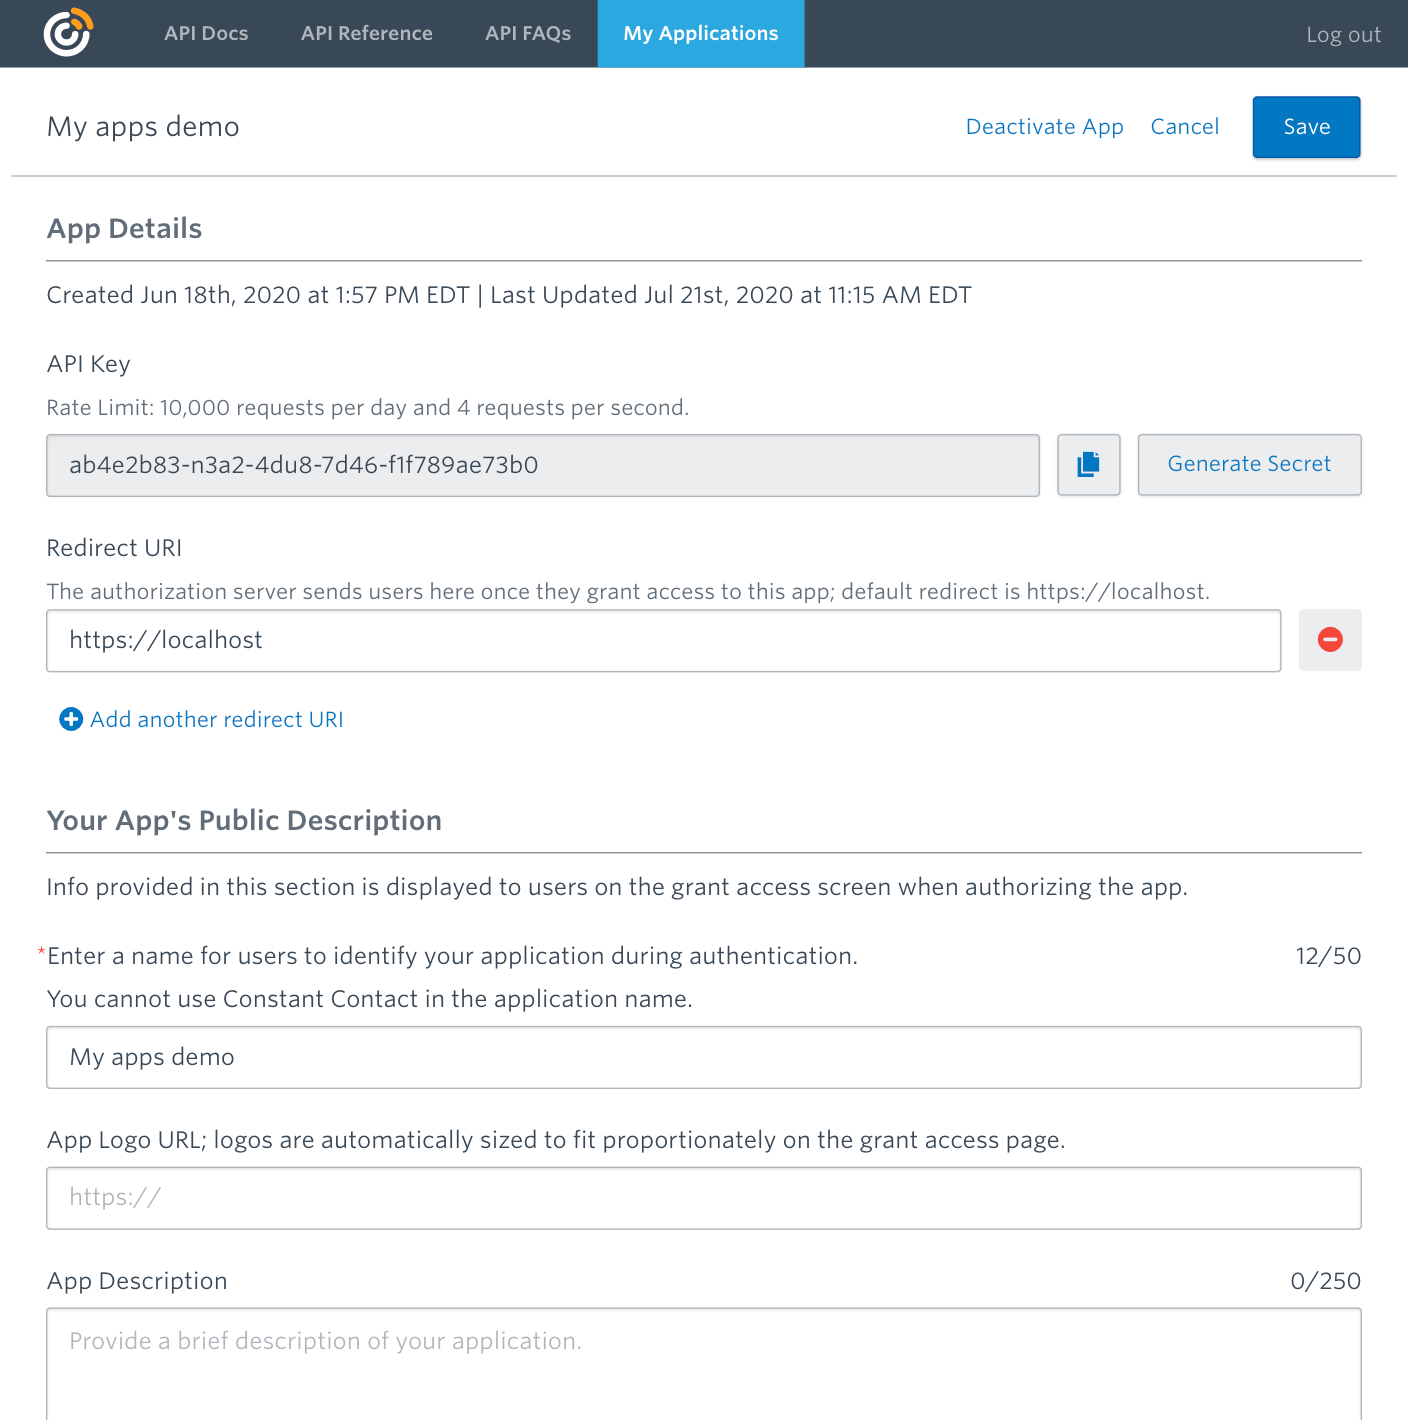
The App details page shows current information about your app, including:
- API key
- Redirect URI
- App Name
- App logo URL
- Description
You can update any information on this page except for the API key value.
Generating a Client Secret
You need a client_secret in addition to the API key and redirect uri to implement OAuth2.0 authorization flows for your app. We only show you the client secret once when it is initially created. Make sure you copy and save it in a secure place.
- Click
 generate and display the client secret.
 - The disclaimer appears, letting you know you’ll have to update your code to use the new secret if a client secret was previously created for your app. Click Cancel if you do not want to generate a new secret, or click Generate Secret.
-
The App Secret overlay displays.

Copy the secret to your clipboard and store it in a secure location.
- Click Close.
Redirect URI
When you register your app, we provide a default redirect URI of https://localhost. You can change it or add additional redirect URIs on the App details page. Your app must have at least one redirect URI.
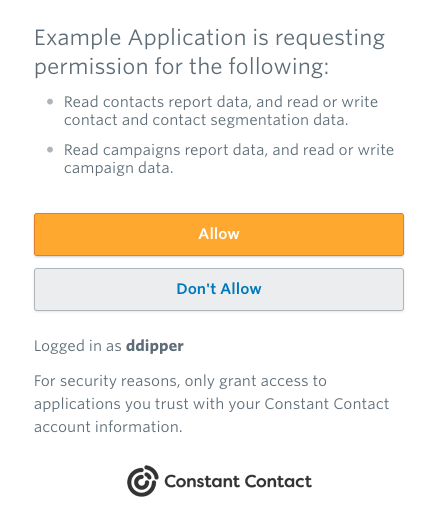
What Your Users Will See
The Public Description section of the App details page has the three properties that your users will see when initially interacting with and granting access to your app in the OAuth flow:
- App Name (required)
- App Logo URL
- Description
Your users will also see the type of data in their Constant Contact account that your application is requesting access to. For more information, see the Authorization Scopes Overview page.