Constant Contact strongly suggests that you use the Proof Key for Code Exchange (PKCE) Flow for all public or untrusted clients. This includes native and single-page applications such as client-side JavaScript applications and mobile applications. PKCE is an OAuth2 security extension that builds upon the standard Authorization Code Flow. The PKCE Flow is used to prevent malicious attacks on applications that cannot securely store a client secret.
In order to use this flow, you must first create and configure a V3 API application. For more information, see the Quick Start Guide.
The PKCE Flow does not use the client secret key to authenticate. Instead, your application generates the following values to use:
code_verifier- A random cryptographic value to include in the authorization request.code_challenge- A SHA-256 hash of thecode_verifiervalue used in exchange for an access token (Bearer).
The Authorization Server stores the code_challenge and uses your application’s authorization request to redirect the user to log in to authenticate with Constant Contact and to grant your application permission to their data. If successful, the Authorization Server responds and sends your client the authorization code, which is valid for one use.
Your application sends a verification request that includes both the authorization code and the code_verifier to the Authorization Server. The Authorization Server checks that the authorization code and code_verifier are valid for the user, then returns the ID token, access token, and optionally the refresh token that your application requires to make V3 API calls to get the user’s Constant Contact data. Use the access token to make requests using the V3 API. Use refresh tokens to obtain new access and refresh tokens to ensure that your users only need to authenticate once.
To authenticate using the PKCE Flow, complete the steps that follow.
Step 1: Generate a Code Verifier and a Code Challenge
Using the PKCE Flow, you must create the cryptographically-random code_verifier value. Use S256 to hash the code_verifier value as the code_challenge value.
Generate the Code Verifier
Generate a code_verifier value in your application and save it. The code_verifier should be a cryptographical value and have a minimum length of 43 characters and a maximum length of 128 characters. Later, you will use this value when:
- Generating a
code_challengevalue. - Exchanging an authorization
codefor an access token.
For example:
   /**
     * This method generates a secure string used as the PKCE code verifier value.
     * In PKCE, you use the code verifier value:
     * 1. When you generate a code challenge value.
     * 2. When you exchange an authorization code for a bearer JWT token.
     * @return A random code verifier value.
     */
    public String generateCodeVerifier() {
        SecureRandom secureRandom = new SecureRandom();
        byte[] bytes = new byte[36];
        secureRandom.nextBytes(bytes);

        return Base64.getUrlEncoder().withoutPadding().encodeToString(bytes);
    }
Generate the Code Challenge
Generate a code_challenge value in your application and save it. The code_challenge value is derived from your code_verifier value. Generate the code_challenge value by using SHA-256 to hash the code_verifier value, then base64 URL encode the results.
For example:
code_challenge = BASE64URL-ENCODE(SHA256(ASCII(code_verifier)))
For more details, see the Proof Key for Code Exchange by OAuth Public Clients sections of RFC 7636.
The following example shows how to create a code_challenge value using SHA-256 to base64 encode the code_verifier value:
    /**
     * This method generates a code challenge value by SHA-256 and base64 encoding the code verifier value.
     * In PKCE, you use the code challenge value when you construct the authorization request uri.
     * @param codeVerifierValue A random string value.
     * @return An encoded code challenge string value.
     * @throws NoSuchAlgorithmException
     */
    public String generateCodeChallengeHash(String codeVerifierValue) throws NoSuchAlgorithmException {
        MessageDigest messageDigest = MessageDigest.getInstance("SHA-256");
        byte[] codeVerifierBytes = codeVerifierValue.getBytes(StandardCharsets.US_ASCII);
        byte[] digest = messageDigest.digest(codeVerifierBytes);

        return Base64.getUrlEncoder().withoutPadding().encodeToString(digest);
    }
Step 2: Create the Authorization Request
Create the authorization request used to direct users to Constant Contact to authenticate their user account and to authorize your application to access their Constant Contact data.
To create an authorization request, make a GET call to the authorization endpoint https://authz.constantcontact.com/oauth2/default/v1/authorize and include all required request query parameters.
For example, the following shows an encoded URL authorization request:
https://authz.constantcontact.com/oauth2/default/v1/authorize?client_id={your_client_id}&redirect_uri=https%3A%2F%2Flocalhost%3A8888&&response_type=code&code_challenge={generated code_challenge value}&code_challenge_method={S256}&state=235o250eddsdff&scope={contact_data%20campaign_data%20offline_access}
Request Parameters
-
code_challenge- Required. Thecode_challengevalue generated by your application. -
code_challenge_method- Required. The hashing algorithm you used to generate thecode_challenge. This value should always be S256. -
client_id— Required. The API key for your application. You can view the API keys for all of your applications or create a new application on the My Applications page. -
redirect_uri— Required. Specify the absolute URI that you want Constant Contact to use when redirecting a user to your application. After a user authorizes your application, Constant Contact redirects the user to your application and appends the authorizationcodeandstate(and optionally thescope) values to the URI as query parameters. Wildcards are not supported except at the domain root level. For more information, see the Authentication Overview page. -
response_type— Required. This flow usescodeas the value to request an authorization code from Constant Contact. -
state- Required. To prevent cross-site request forgery, specify the arbitrarystatestring value you want to use to uniquely identify a user’s session. -
scope— Optional. A list of the scopes that your application requires. The V3 API currently supports theaccount_read,account_update,contact_data,offline_access, andcampaign_datascopes. Scope names must be space-delimited. For example:{contact_data%20campaign_data%20offline_access}.The
offline_accessscope is required for returning refresh tokens. For more information on scopes and the specific scopes required by each V3 API endpoint, see the Scopes Overview page. -
nonce— Optional. For the purpose of mitigating replay attacks, specify the string value to use to associate a client session with anid_token. Theid_tokenincludes information (claims) about the user and, if specified, the nonce value. Theid_tokenis encoded as a JWT and returned in the response when you request an access token. To verify the nonce string value, decode theid_token. -
prompt— Optional. Set the value asloginto always display a login page to the user even if they have logged in to Constant Contact recently.
Example Authorization Request
 /**
     * Use the URIBuilder from org.apache.http to construct an authorization request URI.
     * @param codeChallengeValue The code challenge value that your application encoded.
     * @param redirectUri URI used to redirect users to your application after they complete authorization.
     * @param clientId Your application's client id.
     * @param state A random string value used to help protect your application from cross-site request forgery.
     * @return The full authorization URI
     * @throws URISyntaxException
     */
    public String constructAuthorizationUri(String codeChallengeValue, String redirectUri, String clientId, String state) throws URISyntaxException {
        return new URIBuilder("https://authz.constantcontact.com/oauth2/default/v1/authorize")
                .addParameter("client_id", clientId)
                .addParameter("redirect_uri", redirectUri)
                .addParameter("scope", "offline_access openid")
                .addParameter("response_type", "code")
                .addParameter("state", state)
                .addParameter("code_challenge", codeChallengeValue)
                .addParameter("code_challenge_method", "S256")
                .build()
                .toString();
    }
Step 3: Get Authorization
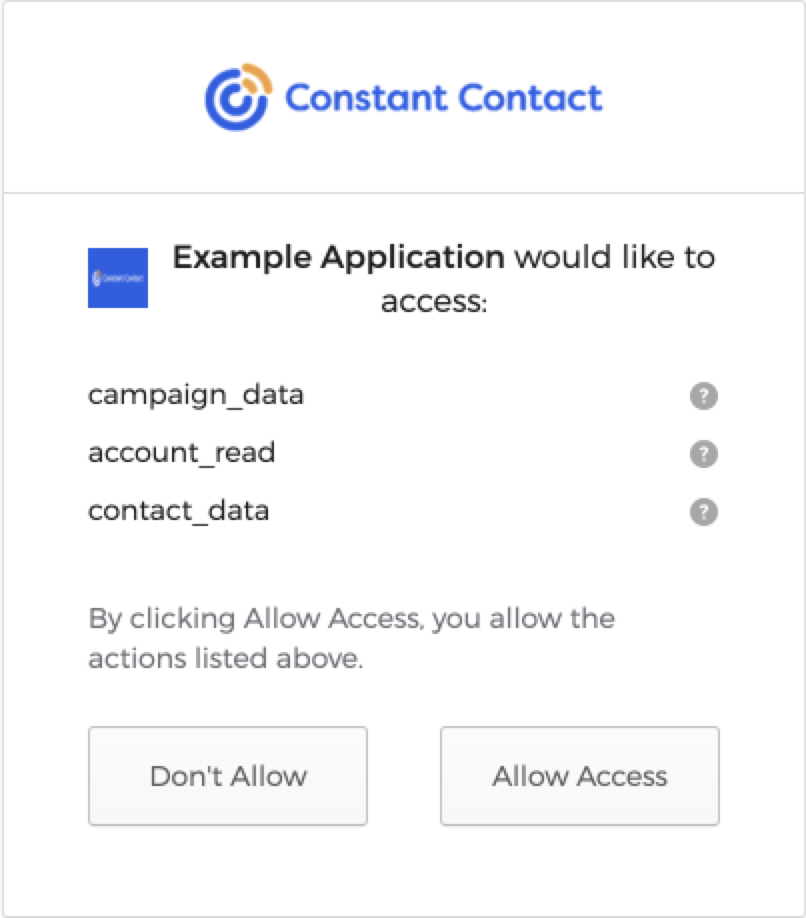
When your application sends an authorization request to the Authorization Server, it directs the user to Constant Contact. Constant Contact prompts the user to sign in to authenticate their user account. Next, Constant Contact displays the Permission Request screen to allow the user to authorize your application access to their data.
If the user authorizes your application, Constant Contact appends the authorization code to the redirect_uri returned in the authorization response. The authorization code is used in exchange for an access token and can be used once.
Step 4: Get the Access and Refresh Tokens
To request an access_token and refresh_token, make a POST request to the Authorization Server using the https://authz.constantcontact.com/oauth2/default/v1/token endpoint.
Query Parameters Include the following required query parameters:
client_id- The ID that is associated with your application.redirect_uri- The redirect URI that you specified as part of the authorization request.code- The authorization code returned in the authorization response.code_verifier- The code verifier value that you generated.
Header Formats
In the header, specify the preferred response formats to return as follows:
"Accept", "application/json""Content-Type", "application/x-www-form-urlencoded"
Example Request
 /**
     * This method exchanges an authorization code, the codeVerifier value you previous generated, for an access token and a refresh token.
     * @param clientId Your application's client id.
     * @param redirectUri The redirect uri that you used as part of the authorization request URL.
     * @param code The authorization code you received from the authorization request.
     * @param codeVerifier The random code verifier value you generated.
     * @return A JSON String containing an access token and a refresh token.
     * @throws IOException
     * @throws URISyntaxException
     */
    public String exchangeCodeAndVerifierForAuthResponse(String clientId, String redirectUri, String code, String codeVerifier) throws IOException, URISyntaxException {
        URI pkceTokenUri = new URIBuilder("https://authz.constantcontact.com/oauth2/default/v1/token")
                .addParameter("client_id", clientId)
                .addParameter("redirect_uri", redirectUri)
                .addParameter("code", code)
                .addParameter("code_verifier", codeVerifier)
                .addParameter("grant_type", "authorization_code")
                .build();

        HttpClient httpClient = HttpClient.newHttpClient();
        HttpRequest request = HttpRequest.newBuilder(pkceTokenUri)
                .POST(HttpRequest.BodyPublishers.ofString(""))
                .header("Accept", "application/json")
                .header("Content-Type", "application/x-www-form-urlencoded")
                .build();

        HttpResponse<String> httpResponse = httpClient.send(request, HttpResponse.BodyHandlers.ofString());

        return httpResponse.body();
    }
Example Response
{
    "token_type": "Bearer",
    "expires_in": 28800,
    "access_token": "eyJraWQiOiIzSDdLVVpkSDlyNTh6RVVDSzNYMlR1b2o0SjV0eldWUF9FRUxQTDd6X3hjIiwiYWxnIjoiUlMyNTYifQ.eyJ2ZXIiOjEsImp0aSI6IkFULkZ6YUUtTVFFb2dKQ1VzZlhSUGtBZldobDllckJndVlYRWphOGFXd1RyRzgiLCJpc3MiOiJodHRwczovL2lkZW50aXR5LmNvbnN0YW50Y29udGFjdC5jb20vb2F1dGgyL2F1czFsbTNyeTltRjd4MkphMGg4IiwiYXVkIjoiaHR0cHM6Ly9hcGkuY2MuZW1haWwvdjMiLCJpYXQiOjE2NDQ0Mjc3NzMsImV4cCI6MTY0NDQ1NjU3MywiY2lkIjoiY2M5NGMyZDYtNmU3MC00MjZjLWFmZDEtNzFjOGZhNWY0ODkwIiwidWlkIjoiMDB1MWlieDhsaGIzYW12SFIwaDgiLCJzY3AiOlsiYWNjb3VudF9yZWFkIiwiZW1haWwiLCJjYW1wYWlnbl9kYXRhIiwicHJvZmlsZSIsImFkZHJlc3MiLCJjb250YWN0X2RhdGEiLCJvcGVuaWQiXSwic3ViIjoiZ2Vla3NxdWFkIiwicGxhdGZvcm1fdXNlcl9pZCI6ImQzYTA2ZTYyLTJmMTQtNGQ5Ni05NDUzLTI2NTkxYWI1M2YwZCJ9.saJxgUYx1_OKUteH01KV71vzjaxqTKnZ3XfD4QKtsIkjrmcf4tUWEFSzjuF1kdxLvlMoCyr_MwO81ApwYX2UU0YRhkVsfw2VLR4KpO89ILul7ZJZyzzsVKak8BrgLhqR1AB7X116VRjsH74vD4D-1e4uKKUlK4yefsZE14kFgDZNi74_WPn5FBGeicwMsStdG3qms8X-6LqIxuZ5fXgSxK9wDEBe-xJfJSqAqo1vJKMqw2JT_NvBBLDXqoSg0_q_0IqbxXEMHdX2J_DHGKrY7w1QQGmeBU_BIlewQPUxUGX-dbRavxncBpItt1tsRLBIiPbPkQ_zDN8_J9lPIxJksA",
    "scope": "account_read offline_access",
    "refresh_token": "HFsqfgtZuGyffnD2qb-AQKWDURWAXM8hlgYIFEwaq4E",
    "id_token": "eyJ0eXAiOiJKV1QiLCJhbGciOiJIUzI1NiJ9.eyJzdWIiOiIwMDEyMzQ1ejRXMzhHS3BPMGg3IiwibmFtZSI6IkpvaG4gRG9lIiwiZW1haWwiOiJqZG9lQGFiYy5jb20iLCJ2ZXIiOjEsImlzcyI6Imh0dHBzOi8vaWRlbnRpdHkuY29uc3RhbnRjb250YWN0LmNvbS9vYXV0aDIvYXVzengwNm81alJlZlE4RjQwaDciLCJhdWQiOiJmYThhMDZkYy1iMDAwLTQ3NWMtYWNlZC01NWNlYzVhZWUzMjUiLCJpYXQiOjE2NDQ4NTc4NDcsImV4cCI6MTY0NDg2MTQ0NywianRpIjoiSUQuRFhRQ2pxQmd3M28xMnVHdlN5R2ZpQTJ2QjVFcGNvSktsajBqbFhSc2lqayIsImFtciI6WyJwd2QiXSwiaWRwIjoiMDBvbnBtc2prYmdPc0wydlcwaDciLCJub25jZSI6Ijg2MDgyNTYwMyIsInByZWZlcnJlZF91c2VybmFtZSI6Impkb2UiLCJhdXRoX3RpbWUiOjE2NDQ4NTc4NDQsImF0X2hhc2giOiJuWk5sRjduWGo2bV9UNEFKcXl0c1RRIn0.ToO_Ye1YHRx4hWCMBnrT6yksWvkrpHfGmXcHTh7B75A"
}
-
token_type— This value is always set toBearer. -
expires_in— The number of seconds remaining until theaccess_tokenexpires. -
access_token— The newaccess_tokenvalue used to send requests with the V3 API. Access tokens automatically expire 1440 minutes (86,400 seconds). Making an API call with an expired access token returns a 401 unauthorized status code. -
scope— The type of data in Constant Contact that the user is granting your application permission to use. Theoffline_accessscope is required to get a refresh token. -
refresh_token— Each refresh token corresponds to an access token. Use the refresh token to obtain a newaccess_tokenwhen the correspondingaccess_tokenexpires. -
id_token— The JWT that includes information about the user such as their name and email address, and if specified, thenoncevalue you passed in the authorization request. Decode theid_tokento verify the nonce value and view user information.
Step 5: Validate the Access Token
For each new access token that you receive, follow best practices for security by validating the signature and claims of the access token.
Load the JSON web-key Set
Use the method that follows to load the Constant Contact public json web-key set used to validate access tokens.
 /**
     * This method uses the java11 http client to load Constant Contact's public json web key set.
     * In real use cases, this value should be cached.
     * @return Constant Contact's public json web key set for the v3 API.
     */
    public String getPublicJsonWebKeySet() throws IOException {
        HttpClient httpClient = HttpClient.newHttpClient();
        HttpRequest request = HttpRequest.newBuilder(URI.create("https://identity.constantcontact.com/oauth2/aus1lm3ry9mF7x2Ja0h8/v1/keys"))
                .GET()
                .header("Accept","application/json")
                .header("Content-Type", "application/x-www-form-urlencoded")
                .build();
        HttpResponse<String> httpResponse = httpClient.send(request, HttpResponse.BodyHandlers.ofString());

        return httpResponse.body();
    }
Verify the Access Token Claims
Use the method that follows to parse the access token, and then validate the signature and claims of the access token. The code examples in this step use the org.jose4j library.
Use the jwt parameter to pass in the access token. Use the jsonWebKeySetJson parameter to pass the JSON Web Key Set (JWKS) value that was returned in the previous step (Load the JSON web-key set to get the access token).
If the access token is not valid or if a required claim is missing or incorrect, an exception occurs.
    /**
     * This method uses the jose4j library to verify the claims on the JWT.
     * It throws an exception if it fails to parse the JWT, or the JWT does not include the expected claim.
     * @param jwt String containing a JSON web token.
     * @param jsonWebKeySetJson the set of keys available at https://identity.constantcontact.com/oauth2/aus1lm3ry9mF7x2Ja0h8/v1/keys
     * @throws JoseException
     * @throws InvalidJwtException
     */
    public void verifyJwtToken(String jwt, String jsonWebKeySetJson) throws JoseException, InvalidJwtException {

        JsonWebKeySet jsonWebKeySet = new JsonWebKeySet(jsonWebKeySetJson);
        VerificationJwkSelector jwkSelector = new VerificationJwkSelector();
        JsonWebSignature jws = new JsonWebSignature();
        jws.setCompactSerialization(jwt);

        JsonWebKey jwk = jwkSelector.select(jws, jsonWebKeySet.getJsonWebKeys());

        JwtConsumer jwtConsumer = new JwtConsumerBuilder()
                .setRequireExpirationTime()
                .setRequireSubject()
                .setExpectedIssuer("https://identity.constantcontact.com/oauth2/aus1lm3ry9mF7x2Ja0h8")
                .setExpectedAudience("https://api.cc.email/v3")
                .setVerificationKey(jwk.getKey())
                .setJwsAlgorithmConstraints(AlgorithmConstraints.ConstraintType.PERMIT, AlgorithmIdentifiers.RSA_USING_SHA256)
                .build();

        jwtConsumer.processToClaims(jwt);
    }
Check the following claims:
- Compare the
cid(client identifier) value to ensure that it matches your application API key - The
platform_user_idclaim in the access token uniquely identifies a Constant Contact user.
JwtClaims claims = consumer.processToClaims(token);

     String cid = claims.get("cid")
     if (! apiKey.equals(cid)) {
     throw new InvalidJwtException("Api key in token incorrect");
     }
     String userId = claims.get("platform_user_id")

     if (userId == null) {
     throw new InvalidJwtException("Token is missing platform_user_id");
     }
Step 6: Add the Access Token to the Authorization Request
After verifying the access token claims and signature, use the access_token to send requests in the V3 API by adding it to the Authorization request header in the format Authorization: Bearer {your_access_token}. When an access token expires, users must reauthorize your application with Constant Contact. Access tokens automatically expire after 1440 minutes (86,400 seconds).
Making an API call with an expired access token returns a 401 unauthorized status code. See the Authorization Request Errors table in the Authorization Overview for information on how to handle authorization request errors.
Step 7 (Optional): Check the Access Token Expiration Timestamp
You can quickly check to see if the access token is expired or not using the method that follows.
Use the jwt parameter to pass in the access token. This method returns True for an expired token if the expiration time is within 5 minutes (300 seconds) of the current time, or False if the token has not expired. If the access token expires, you can exchange it for a new access and refresh token using the Refresh the Access Token procedure.
  /**
     * This method checks if the current time is greater than or equal to the JWT expiration claim.
     * @param jwt A String JSON web token.
     * @return True if the jwt token is expired. False if the token is not expired.
     */
    public boolean checkIfTokenIsExpired(String jwt) throws InvalidJwtException, MalformedClaimException {

        JwtConsumer jwtConsumer = new JwtConsumerBuilder()
                .setRequireExpirationTime()
                .setSkipDefaultAudienceValidation()
                .setDisableRequireSignature()
                .setSkipSignatureVerification()
                .build();
         JwtClaims jwtClaims = jwtConsumer.processToClaims(jwt);
         return NumericDate.now().getValue() >= jwtClaims.getExpirationTime().getValue();
    }
Example Response
{
  "token_type": "Bearer",
  "expires_in": "28800",
  "access_token": "eyJraWQiOiIzSDdLVVpkSDlyNTh6RVVDSzNYMlR1b2o0SjV0eldWUF9FRUxQTDd6X3hjIiwiYWxnIjoiUlMyNTYifQ.eyJ2ZXIiOjEsImp0aSI6IkFULkZ6YUUtTVFFb2dKQ1VzZlhSUGtBZldobDllckJndVlYRWphOGFXd1RyRzgiLCJpc3MiOiJodHRwczovL2lkZW50aXR5LmNvbnN0YW50Y29udGFjdC5jb20vb2F1dGgyL2F1czFsbTNyeTltRjd4MkphMGg4IiwiYXVkIjoiaHR0cHM6Ly9hcGkuY2MuZW1haWwvdjMiLCJpYXQiOjE2NDQ0Mjc3NzMsImV4cCI6MTY0NDQ1NjU3MywiY2lkIjoiY2M5NGMyZDYtNmU3MC00MjZjLWFmZDEtNzFjOGZhNWY0ODkwIiwidWlkIjoiMDB1MWlieDhsaGIzYW12SFIwaDgiLCJzY3AiOlsiYWNjb3VudF9yZWFkIiwiZW1haWwiLCJjYW1wYWlnbl9kYXRhIiwicHJvZmlsZSIsImFkZHJlc3MiLCJjb250YWN0X2RhdGEiLCJvcGVuaWQiXSwic3ViIjoiZ2Vla3NxdWFkIiwicGxhdGZvcm1fdXNlcl9pZCI6ImQzYTA2ZTYyLTJmMTQtNGQ5Ni05NDUzLTI2NTkxYWI1M2YwZCJ9.saJxgUYx1_OKUteH01KV71vzjaxqTKnZ3XfD4QKtsIkjrmcf4tUWEFSzjuF1kdxLvlMoCyr_MwO81ApwYX2UU0YRhkVsfw2VLR4KpO89ILul7ZJZyzzsVKak8BrgLhqR1AB7X116VRjsH74vD4D-1e4uKKUlK4yefsZE14kFgDZNi74_WPn5FBGeicwMsStdG3qms8X-6LqIxuZ5fXgSxK9wDEBe-xJfJSqAqo1vJKMqw2JT_NvBBLDXqoSg0_q_0IqbxXEMHdX2J_DHGKrY7w1QQGmeBU_BIlewQPUxUGX-dbRavxncBpItt1tsRLBIiPbPkQ_zDN8_J9lPIxJksA",
  "scope": "account_read offline_access",
  "refresh_token": "s8Mu4hfiwmug7ru4Rcoo4hjkawiw4OUTH2ixvsy3b8"
}
Step 8 (Optional): Refresh the Access Token
To avoid having a user reauthenticate and reauthorize your application with Constant Contact, use the refresh token to get a new access token and a new refresh token. To refresh the access token, send a POST request to the https://authz.constantcontact.com/oauth2/default/v1/token authorization endpoint.
Constant Contact rate limits the token endpoint. A 429 response will likely be returned if you attempt to refresh an access token before every V3 API request. Constant Contact recommends that you only send a refresh token request to get a new access token if your existing access token is expired or about to expire.
Request parameters
-
client_id- Required. Specify theclient_idto associate with your application. -
refresh_token— Required. The refresh token that corresponds to the access token you are trying to refresh. -
grant_type— Required. The value isrefresh_token. This specifies that the purpose of this request is to refresh an access token. -
redirect_uri— Enter the redirect URI that was used as part of the authorization request URL.
Header Formats
In the header, specify the preferred response formats to return as follows:
"Accept", "application/json""Content-Type", "application/x-www-form-urlencoded"
Example Request
/**
     * This method exchanges a refresh token for a new access token and a new bearer token.
     * @param clientId Your application's client id.
     * @param refreshToken A refresh token.
     * @param redirectUri URI used to redirect users to your application after they complete authorization.
     * @return A JSON object containing a new access token and a new bearer token
     * @throws URISyntaxException
     * @throws IOException
     */
    public String refreshPKCEAccessToken(String clientId, String refreshToken, String redirectUri) throws URISyntaxException, IOException {
        URI pkceTokenRefreshUri = new URIBuilder("https://authz.constantcontact.com/oauth2/default/v1/token")
                .addParameter("client_id", clientId)
                .addParameter("redirect_uri", redirectUri)
                .addParameter("refresh_token", refreshToken)
                .addParameter("grant_type", "refresh_token")
                .build();
        HttpClient httpClient = HttpClient.newHttpClient();
        HttpRequest request = HttpRequest.newBuilder(pkceTokenRefreshUri)
                .POST(HttpRequest.BodyPublishers.ofString(""))
                .header("Accept","application/json")
                .header("Content-Type", "application/x-www-form-urlencoded")
                .build();
        HttpResponse<String> httpResponse = httpClient.send(request, HttpResponse.BodyHandlers.ofString());

        return httpResponse.body();
    }
Example Response
{
  "token_type": "Bearer",
  "expires_in": "28800",
  "access_token": "eyJraWQiOiIzSDdLVVpkSDlyNTh6RVVDSzNYMlR1b2o0SjV0eldWUF9FRUxQTDd6X3hjIiwiYWxnIjoiUlMyNTYifQ.eyJ2ZXIiOjEsImp0aSI6IkFULkZ6YUUtTVFFb2dKQ1VzZlhSUGtBZldobDllckJndVlYRWphOGFXd1RyRzgiLCJpc3MiOiJodHRwczovL2lkZW50aXR5LmNvbnN0YW50Y29udGFjdC5jb20vb2F1dGgyL2F1czFsbTNyeTltRjd4MkphMGg4IiwiYXVkIjoiaHR0cHM6Ly9hcGkuY2MuZW1haWwvdjMiLCJpYXQiOjE2NDQ0Mjc3NzMsImV4cCI6MTY0NDQ1NjU3MywiY2lkIjoiY2M5NGMyZDYtNmU3MC00MjZjLWFmZDEtNzFjOGZhNWY0ODkwIiwidWlkIjoiMDB1MWlieDhsaGIzYW12SFIwaDgiLCJzY3AiOlsiYWNjb3VudF9yZWFkIiwiZW1haWwiLCJjYW1wYWlnbl9kYXRhIiwicHJvZmlsZSIsImFkZHJlc3MiLCJjb250YWN0X2RhdGEiLCJvcGVuaWQiXSwic3ViIjoiZ2Vla3NxdWFkIiwicGxhdGZvcm1fdXNlcl9pZCI6ImQzYTA2ZTYyLTJmMTQtNGQ5Ni05NDUzLTI2NTkxYWI1M2YwZCJ9.saJxgUYx1_OKUteH01KV71vzjaxqTKnZ3XfD4QKtsIkjrmcf4tUWEFSzjuF1kdxLvlMoCyr_MwO81ApwYX2UU0YRhkVsfw2VLR4KpO89ILul7ZJZyzzsVKak8BrgLhqR1AB7X116VRjsH74vD4D-1e4uKKUlK4yefsZE14kFgDZNi74_WPn5FBGeicwMsStdG3qms8X-6LqIxuZ5fXgSxK9wDEBe-xJfJSqAqo1vJKMqw2JT_NvBBLDXqoSg0_q_0IqbxXEMHdX2J_DHGKrY7w1QQGmeBU_BIlewQPUxUGX-dbRavxncBpItt1tsRLBIiPbPkQ_zDN8_J9lPIxJksA",
  "scope": "account_read offline_access",
  "refresh_token": "s8Mu4hfiwmug7ru4Rcoo4hjkawiw4OUTH2ixvsy3b8"
}
-
token_type— The value is always set toBearer. -
expires_in- Theaccess_tokenexpiration timestamp, in seconds. -
access_token— The response body returns a newaccess_tokenvalue. -
refresh_token— The response body returns a newrefresh_tokenvalue.